 TileMark
Accounts and security
TileMark is made for a household: everyone gets their own private links, and nothing is reachable without signing in.
Accounts
- Every page needs signing in. There is no open mode and no public sign-up page.
- The first account is made on the welcome screen (protected by the setup code from the container log; see Getting started). It is the admin.
- The admin adds everyone else. Each person has their own links, groups, settings, API key and backups.
- Links are private. The admin manages accounts, but can't see anyone else's links.
- Layout, appearance, language and sort order are saved with the account, so every device looks the same.
Adding people (admin)
In ⚙ Settings → People:
- Enter a username and their first password (at least 8 characters). Tick Also an admin if they should manage TileMark too.
- Press Add person, and tell them their username and password. They can change both in Your account.
For each person, the list shows how many links they have and offers:
| Button | What it does |
|---|---|
| New password | Sets a new password for them and signs them out everywhere. |
| Make admin / Remove admin | Gives or takes admin rights. There is always at least one admin. |
| Turn off 2FA | For someone who lost their phone (only shown when they use it). |
| Remove | Deletes the account with all its links, groups and pictures. Can't be undone. |
In the Home Assistant app, accounts are made automatically for every Home Assistant user who opens TileMark.
Your account
⚙ Settings → Your account changes your username or password. Saving needs your current password. A new password signs you out on your other devices.
Sign out is at the bottom of Settings, whichever card is open.
"Keep me signed in on this device for 30 days" on the sign-in page remembers the device. Without it, you're signed out when the browser closes.
Two-factor sign-in
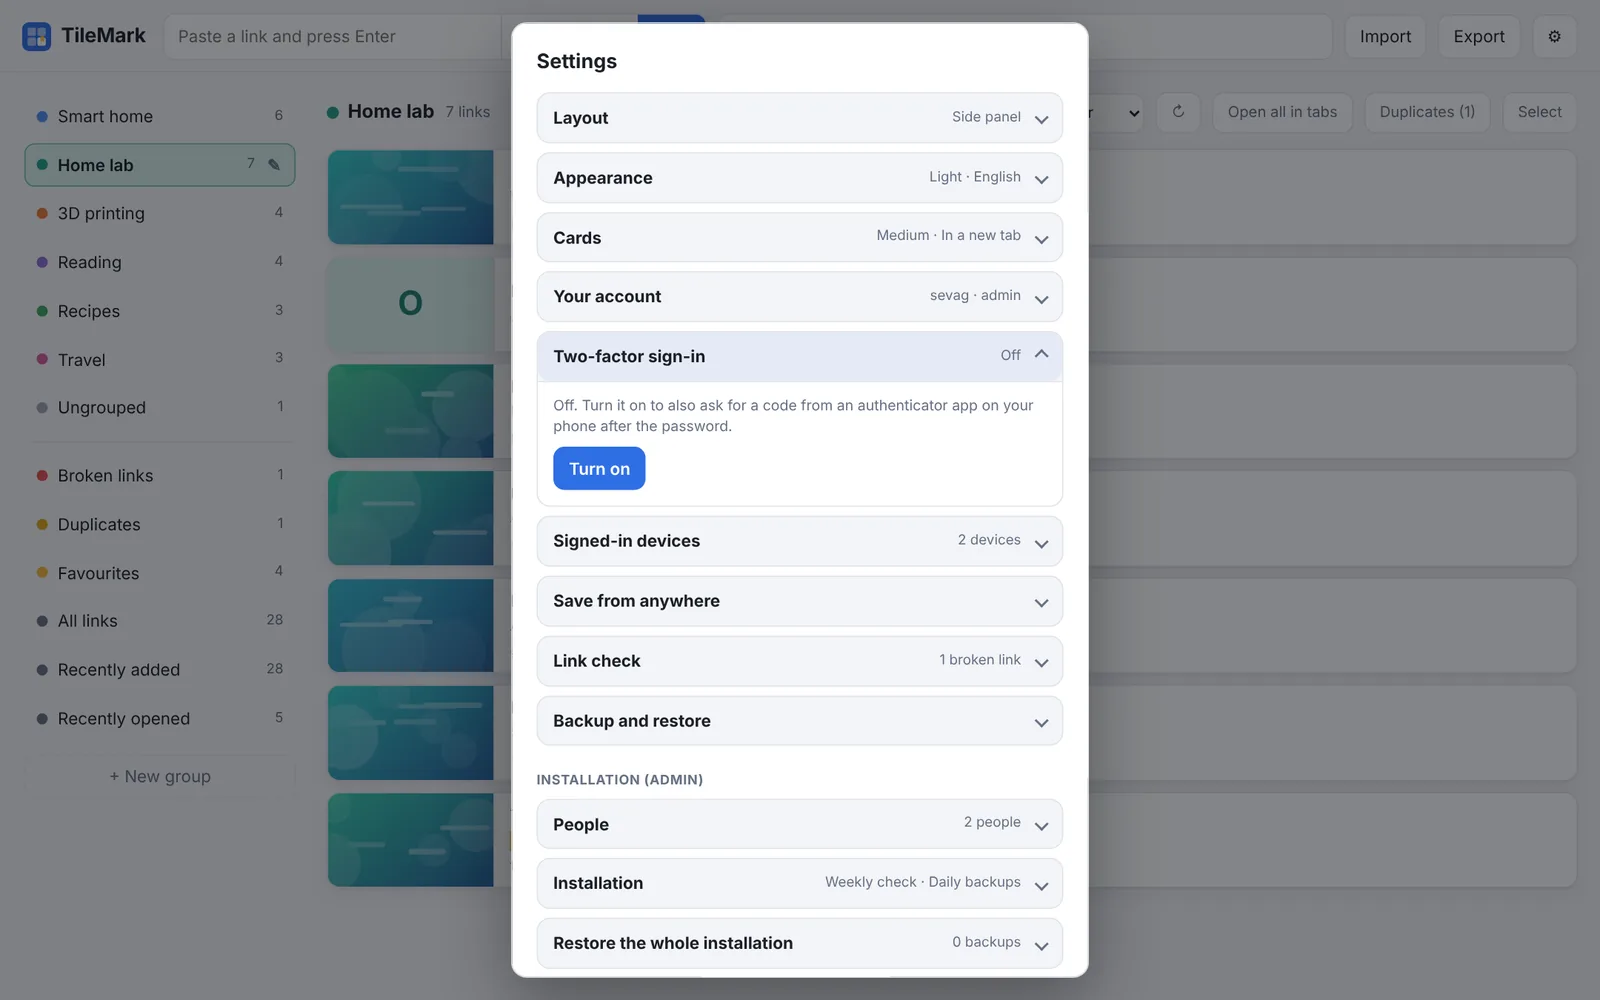
With two-factor sign-in, TileMark asks for a code from an app on your phone after your password. Someone who learns your password still can't get in. It is optional, per account.
Turning it on:
- ⚙ Settings → Two-factor sign-in → Turn on.
- Scan the QR code with an authenticator app: Google Authenticator, Microsoft Authenticator, 1Password, Bitwarden, Aegis, or any other. Can't scan? Type the key shown under it.
- Enter the 6-digit code the app shows and press Confirm and turn on.
- You get ten recovery codes. Download them or write them down, and keep them somewhere safe. Each one signs you in once if your phone isn't at hand.
Signing in then takes your password and the current code from the app (or one recovery code).
- New recovery codes replaces your codes, for example when you've used most of them.
- Turn off switches two-factor sign-in off again.
- Both ask for your current password first.
- Lost your phone? Sign in with a recovery code, then turn it off and on again with your new phone. No recovery codes left? Ask an admin: People → Turn off 2FA.
Inside the Home Assistant sidebar no code is asked: Home Assistant's own sign-in protects it there.
Signed-in devices
⚙ Settings → Signed-in devices lists every browser signed in to your account, with the browser and system, its address, and when it was last active. This device is marked.
- Sign out next to a device ends that session.
- Sign out all other devices ends all of them except the one you're using.
Use it after signing in on someone else's computer, or if you think someone knows your password (and change it too).
Forgot your password?
- Another admin can set a new one: People → New password.
- The only admin? On the server, run:
bash
  docker exec tilemark python app.py reset-login          # the first admin
  docker exec tilemark python app.py reset-login lena     # a specific account
It prints a new random password, turns off that account's two-factor sign-in and signs out its devices. Sign in with it and choose a new password in Your account.
With encrypted backups, a reset password doesn't open them straight away: access comes back when another admin signs in, or with the recovery key.
Protection against guessing
After five wrong passwords, further attempts from that address have to wait: 15 seconds at first, doubling up to 5 minutes. Passwords are stored only as salted hashes, never as plain text.
Local addresses
To show a picture, TileMark visits the page you save, and the page itself tells TileMark where its picture is. A cleverly made page (or another account) could try to make TileMark look inside your network: your router, your NAS, Home Assistant. TileMark prevents this:
- It never visits its own machine, link-local addresses or cloud metadata addresses.
- By default it doesn't visit private network addresses either (
192.168.x.x,10.x.x.x,nas.local…). - Every redirect is checked, and so is the address it actually connects to.
You can still save local links: they show their address and a letter tile instead of a picture.
If you want titles and pictures for local pages too, and you trust everyone who has an account, the admin can turn on ⚙ Settings → Installation → Fetch titles and pictures for local network addresses. Then use ↻ on existing local links to fetch them.
HTTPS
TileMark itself speaks plain HTTP. At home the sign-in keeps others out, but your password travels unencrypted over your network. Put a reverse proxy with HTTPS in front for access from outside, or for full protection; see Getting started. TileMark gives HTTPS visitors a secure, HTTPS-only sign-in cookie automatically.